contact us

Use the form on the right to contact us.

You can edit the text in this area, and change where the contact form on the right submits to, by entering edit mode using the modes on the bottom right.


123 Street Avenue, City Town, 99999

(123) 555-6789

email@address.com


You can set your address, phone number, email and site description in the settings tab.
Link to read me page with more information.

Blog

Butteryum food blog recipes

Filtering by Category: snack recipes

Old Fashioned Movie Theater Popcorn

Patricia @ ButterYum

old.time.movie.theater.popcorn_butteryum

Do you like movie theater popcorn? I don’t care for it at all… it’s way too salty, and quite frankly, artificial tasting from the fake butter-flavored oil they use to pop it. A number of years ago I learned movie theaters, way back when, used coconut oil to pop their kernels so I thought I’d give it a try at home and wow, I couldn’t believe how amazing it was. I’ve been making it at home this way ever since and I can’t tell you how many times I’ve been asked to share the simple recipe (you can find it at the bottom of this post). You’re just 3 simple ingredients away from finding out for yourself how delicious popcorn can truly be!

old.fashioned.movie.theater.popcorn1_butteryum.jpg

Ingredient #1 - Premium Popcorn Kernels

I’ve tried all kinds of brands and the premium ones really do yield bigger, better tasting popcorn with fewer un-popped kernels. We’re fans of this brand and since we make a big batch of popcorn about once a week, we like to buy it in bulk.

old.fashioned.movie.theater.popcorn2_butteryum.jpeg

Ingredient #2 - UNREFINED Coconut Oil

Unrefined coconut oil is important because it retains a sweet coconut flavor that pairs so well with fresh popcorn - actually, there’s something magical that happens when the popcorn, salt, and coconut oil are all mixed together, they take on a natural, “butter-like” flavor. Avoid using refined coconut oil because it’s flavorless so you’ll miss out on that magical flavor pairing.

old.fashioned.movie.theater.popcorn3_butteryum.jpeg

Ingredient #3 - Popcorn Salt

Popcorn salt is very finely milled… much finer than table salt. Because this salt is so fine, it doesn’t bounce off the surface of the popcorn like larger salt crystals do.

old.fashioned.movie.theather.popcorn5_butteryum.jpg

Using the ratio of popcorn and coconut oil listed in the recipe below, place both kernels and oil in a tall, covered stockpot and cook over medium-high heat, shaking the pan frequently, until the sound of popping kernels slows down considerably (long pauses between pops), immediately remove from heat, uncover stock pot, and transfer the popped kernels to a large bowl.

I know people who swear by their beloved Whirley Pop stove-top popcorn makers, but I’ve never had the pleasure of using one. A standard stockpot works fine if you shake it during the popping process.

old.fashioned.movie.theater.popcorn4_butteryum.jpg

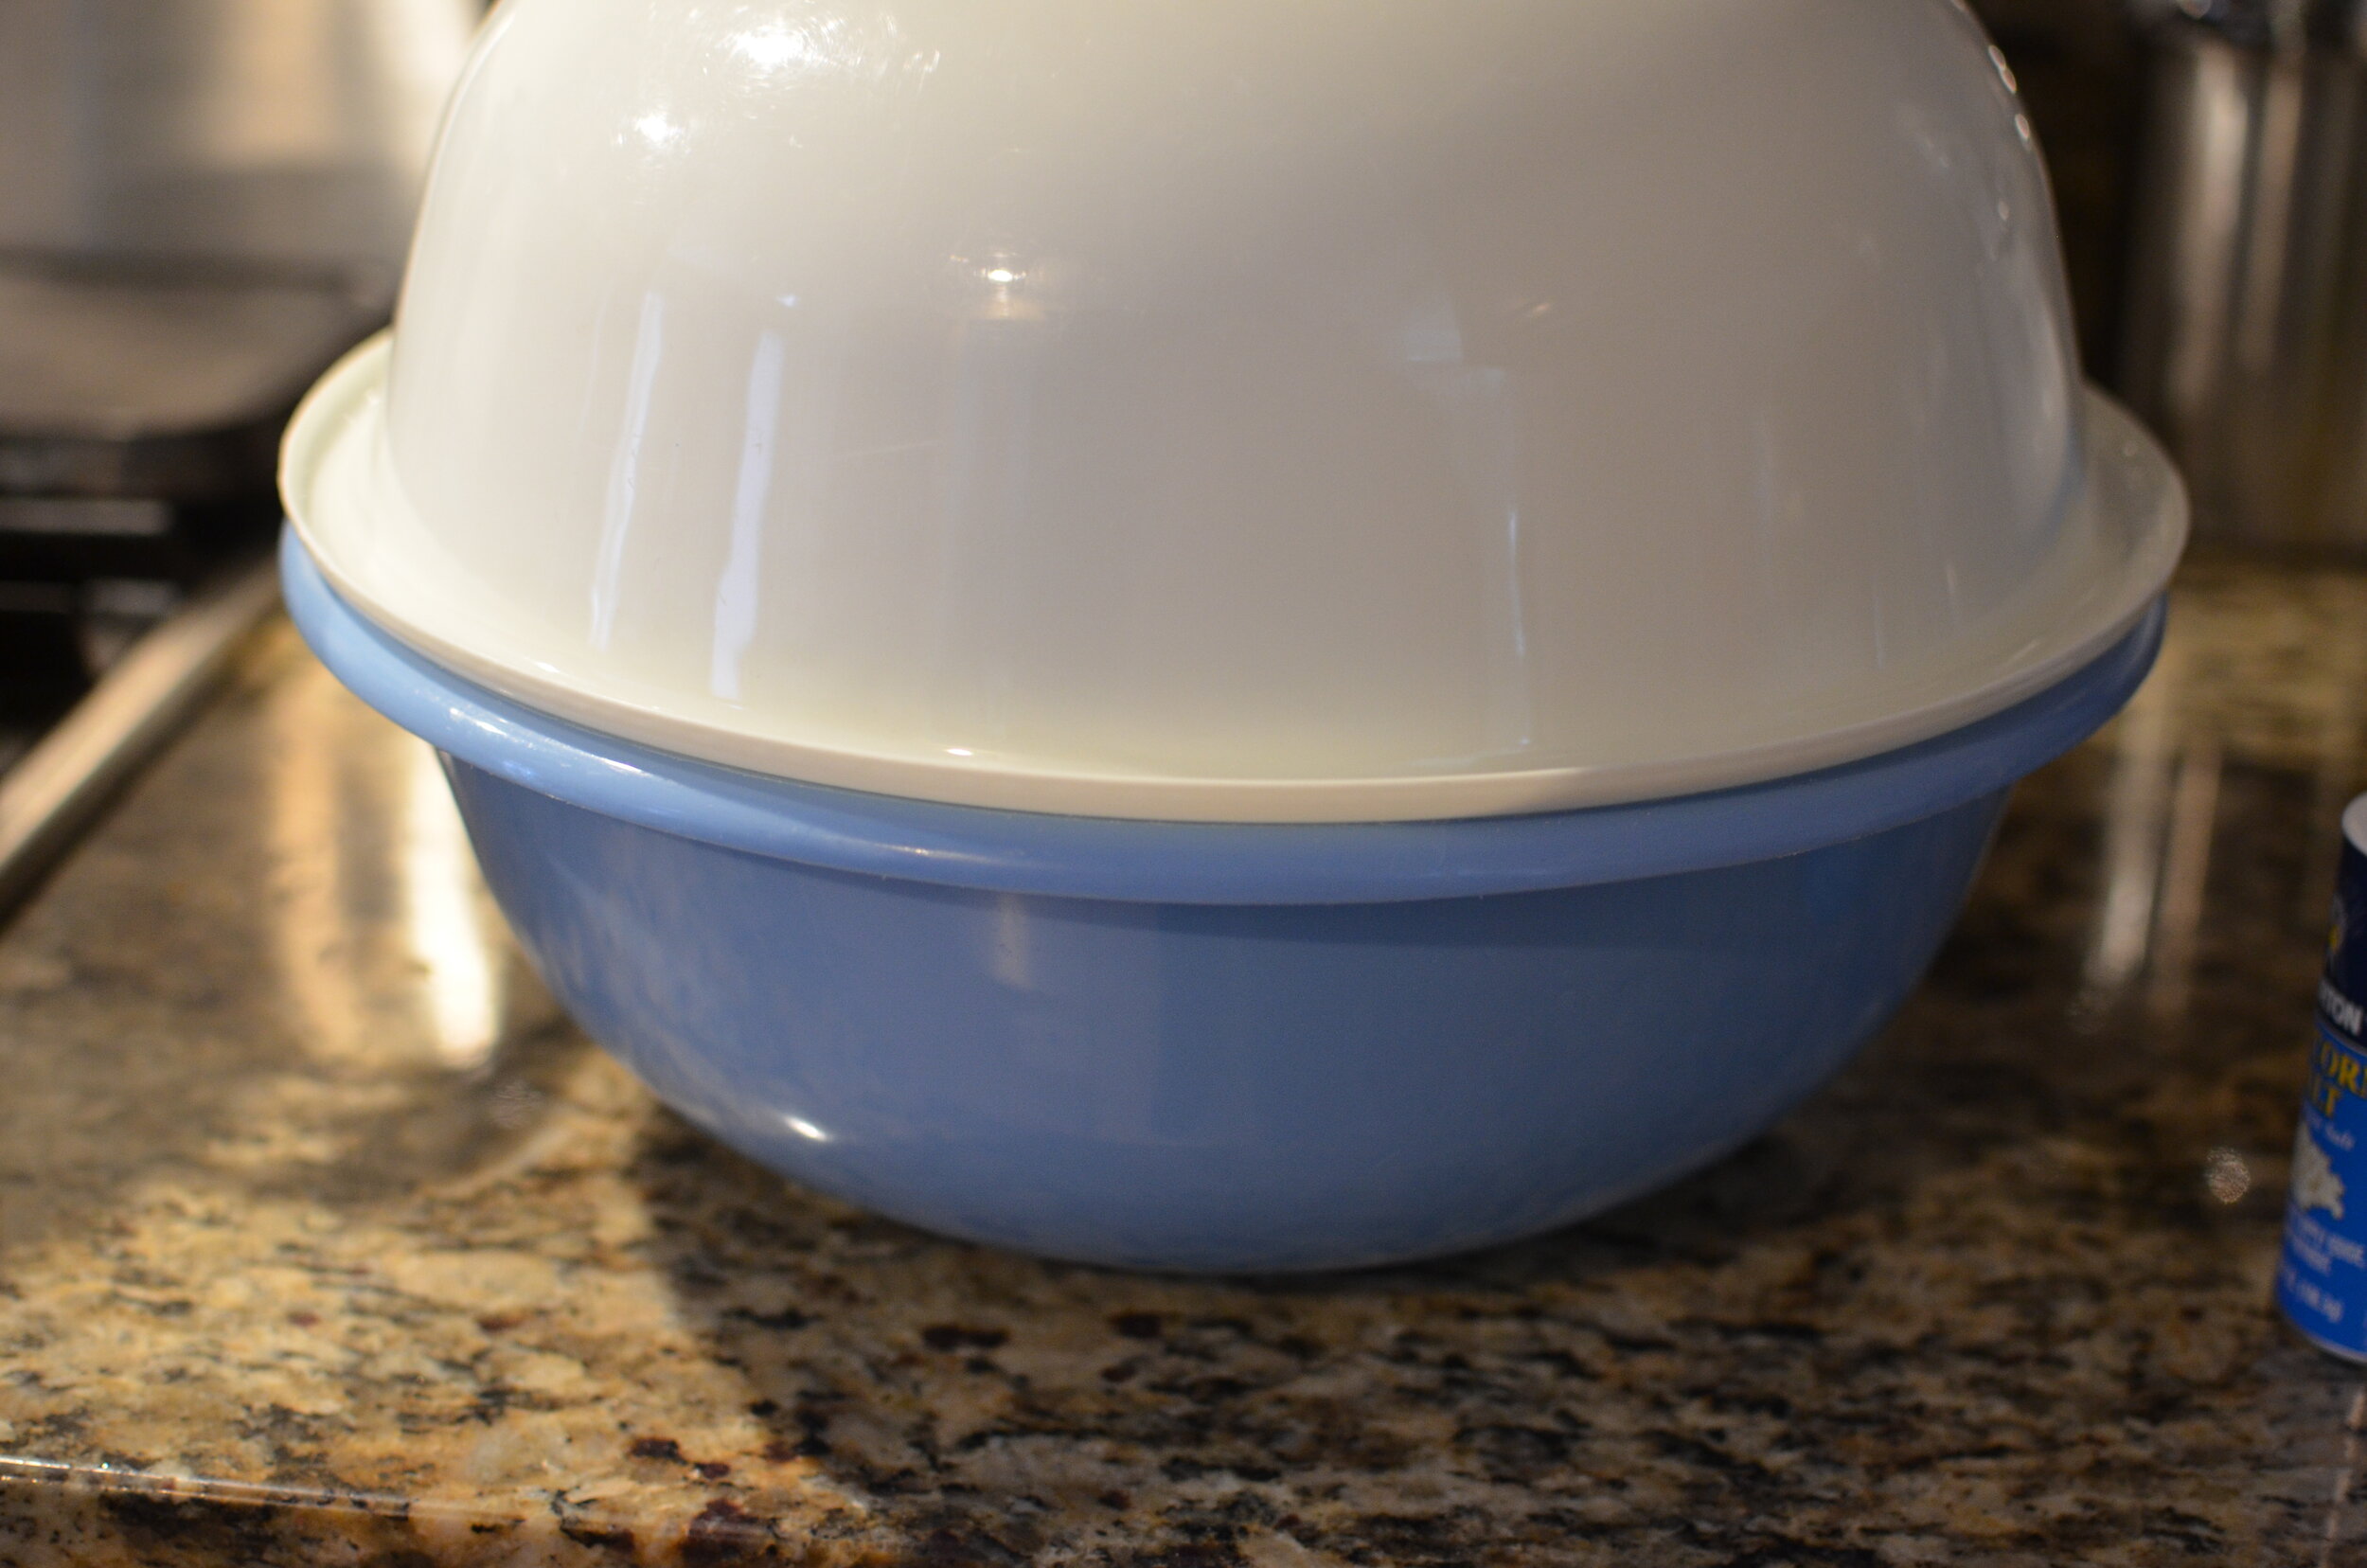
While the freshly popped popcorn is still hot, pour it into a large bowl and sprinkle with popcorn salt. Cover the bowl with a lid or an upside down bowl and shake vigorously to evenly disperse the seasoning. Taste and adjust if more seasoning is needed. Serve immediately.

Items used to make this recipe:

(affiliate links)


Old Fashioned Movie Theater Popcorn

makes 8 cups (recipe doubles well - just be sure to use a larger stockpot)

Printable Recipe

Ingredients

Directions

  1. Place a 6-quart or larger stockpot over medium-high heat and melt coconut oil; add popcorn kernels in a single layer and cover with lid.

  2. When kernels start popping, start shaking stockpot from side-to-side until the popping nearly ends (slows considerably with long pauses between pops).

  3. Immediately remove stockpot from heat, uncover, and pour freshly popped popcorn into a large bowl.

  4. While the popcorn is still hot and steamy, sprinkle with popcorn salt; cover and shake well to distribute salt. Taste and adjust as needed.

Old Fashioned Raisin Filled Cookies

Patricia @ ButterYum

old.fashioned.raisin.filled.cookies_butteryum

Here’s an old-fashioned Christmas time treat that my extended family always looks forward to. My husband’s beloved aunt made them for years end years, but she recently transitioned to an assisted living facility and no longer has access to a kitchen so she handed the torch to me.

This recipe makes 35 huge sandwich cookies, which is not a problem for our large extended family, but you may want to consider scaling the recipe down if you don’t need quite so many. By the way, one of these cookies and a cup of coffee or tea make an excellent breakfast.

9049157E-3B06-4740-91DB-634A10228FFF.jpeg

Forget about rolling the dough on a floured surface. It’s much neater to roll between two layers of parchment or wax paper. I rolled this dough to 1/8-inch thickness using rolling guides to ensure my dough is exactly the same thickness throughout.

1DDACF8F-1488-4BA5-A800-C87B4C74633A.jpeg

See how easily the parchment releases from the dough? Again, no extra flour making a mess everywhere.

9115C273-641B-4236-95D7-95BF06A18BFD.jpeg

I cut my dough with a 3-inch round cutter. The cookies will spread a bit in the oven so you don’t want to make them any bigger than this.

making.raisin.filled.cookies.1_butteryum

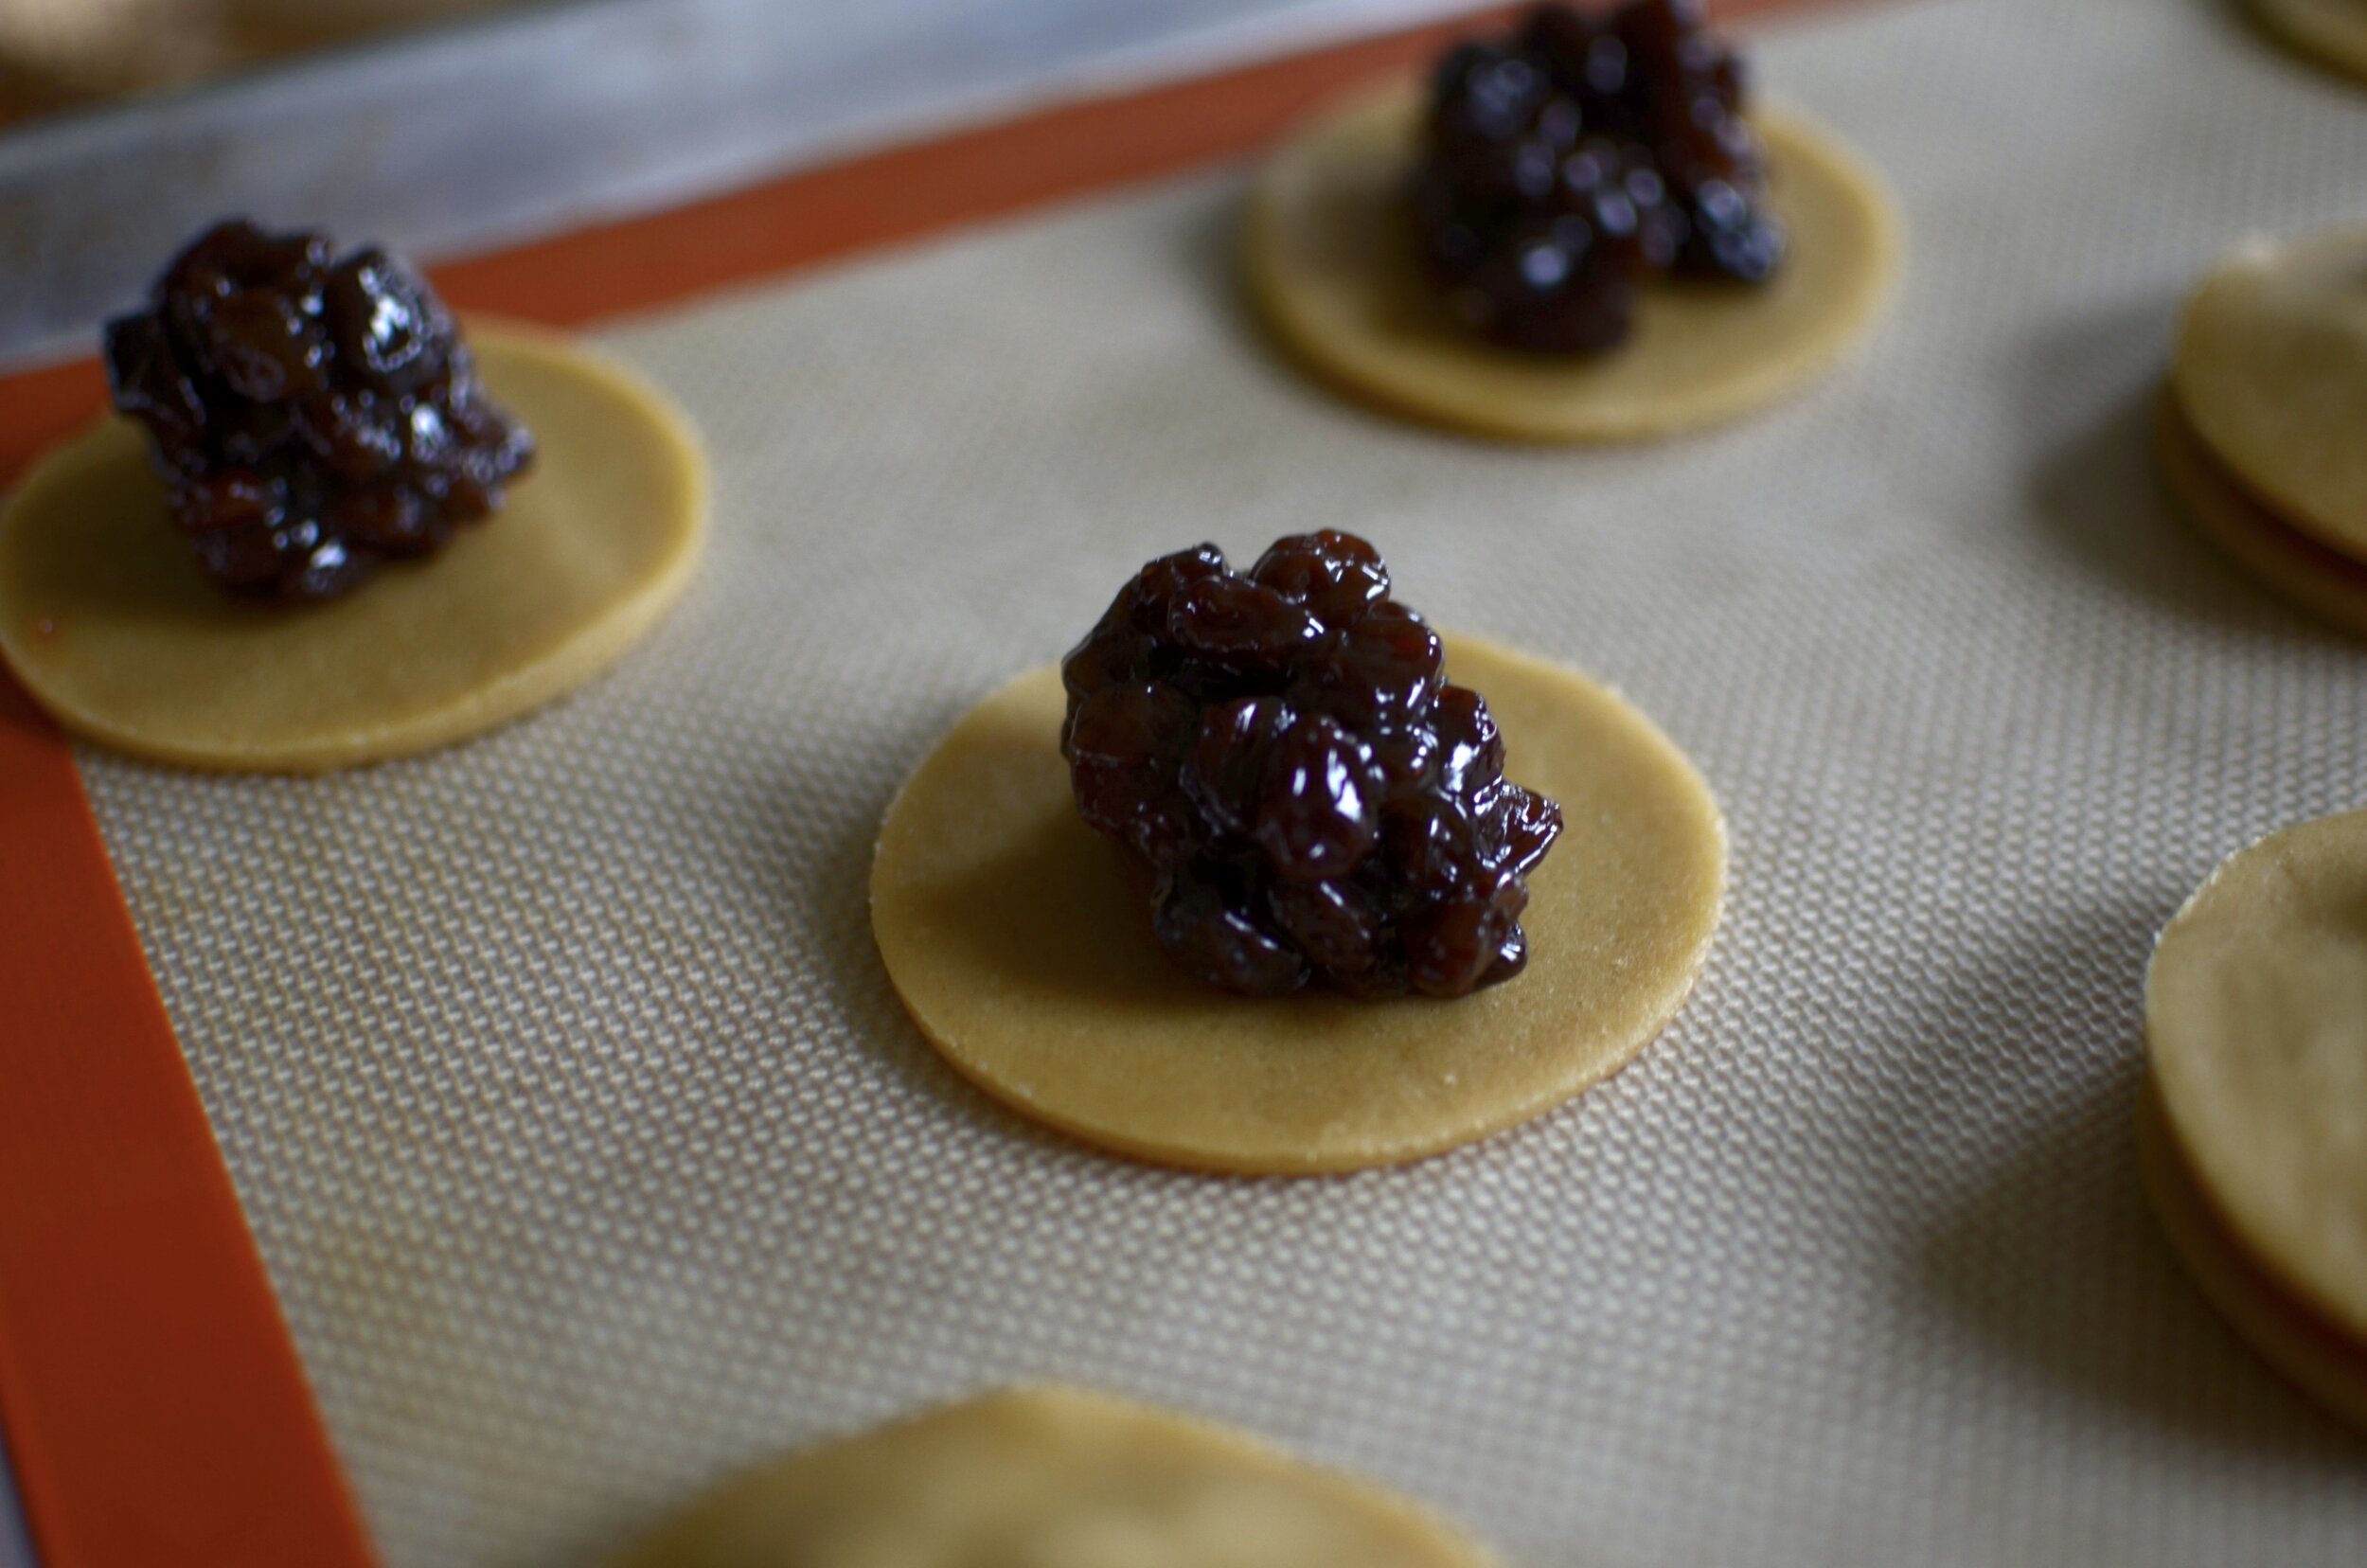
To ensure each of the cookies end up the same size, I use a #50 scoop to portion the filling. NOTE how filling in the photo isn’t overly juicy - you may need to drain yours a bit before using. Too much liquid in the filling will make the cookies bottoms soggy.

making.raisin.filled.coolies.2_butteryum

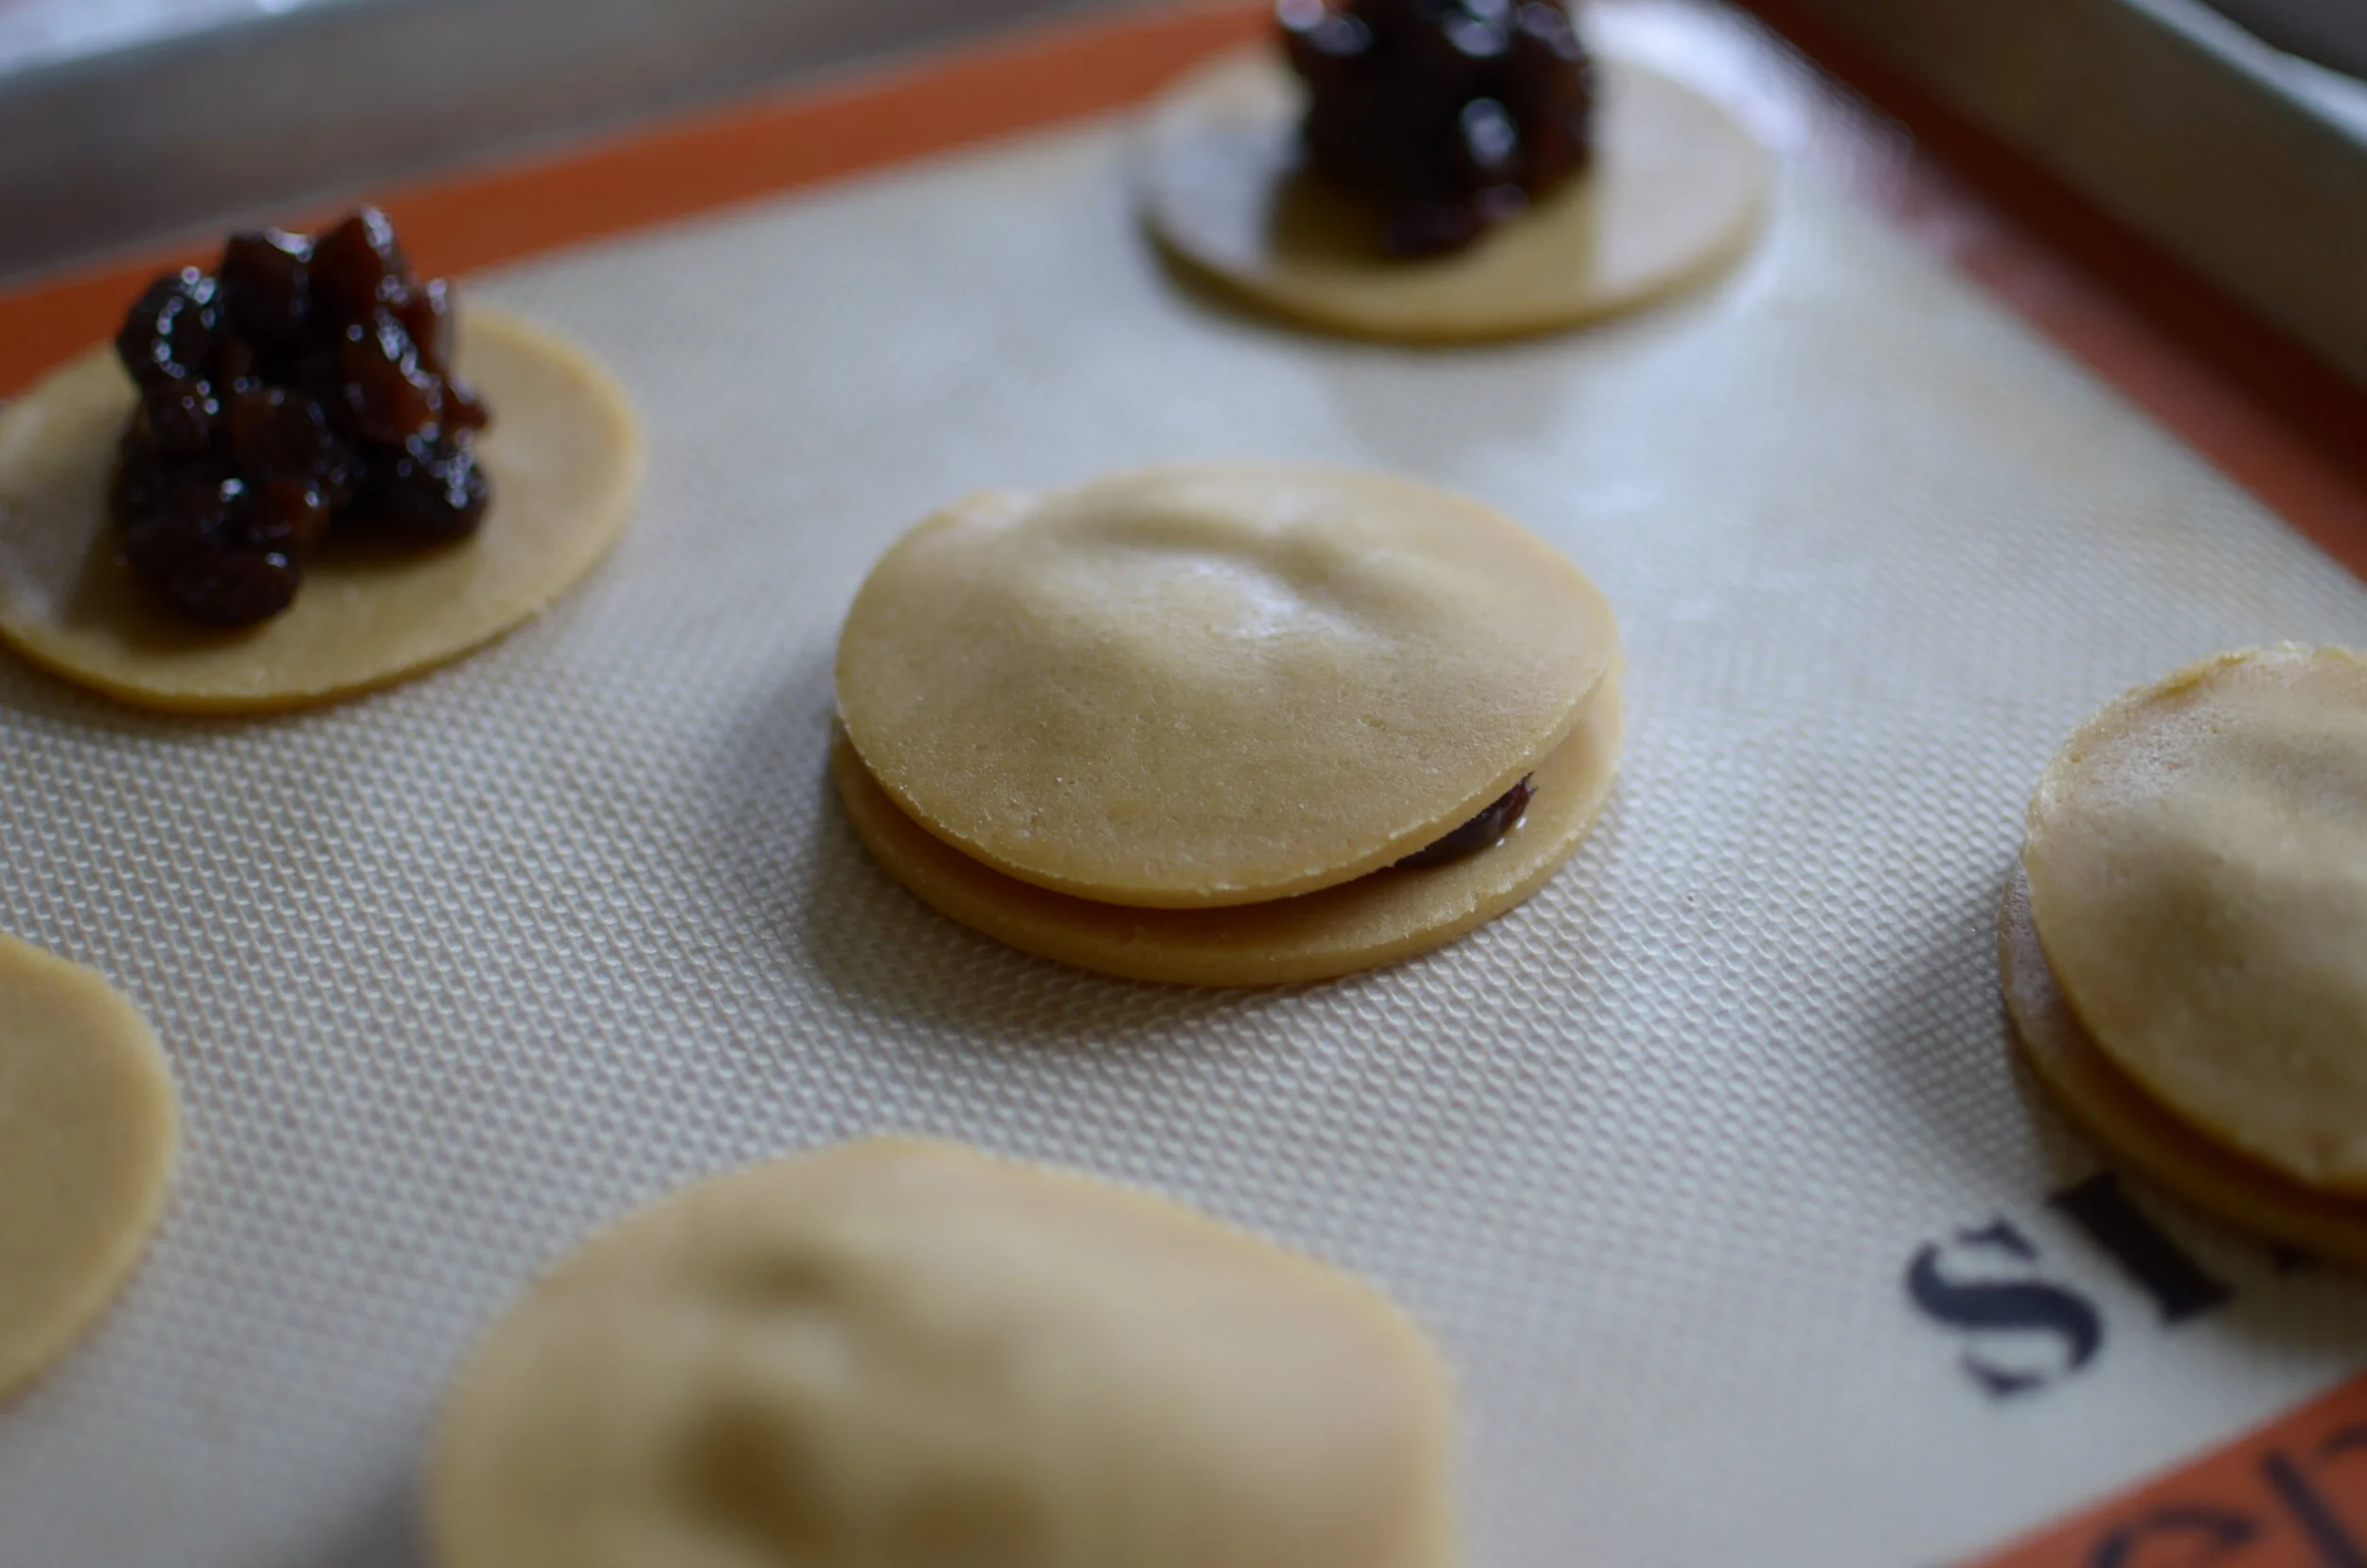
Time to add a 2nd disk of dough for the top and press it down slightly to spread the filling a bit. Don’t go too far - you don’t want the filling to ooze out.

making.raisin.filled.cookies.3_butteryum

Gently press the edges together to seal the dough - no need for water or egg wash to glue the disks together.

making.raisin.filled.cookies.4_butteryum

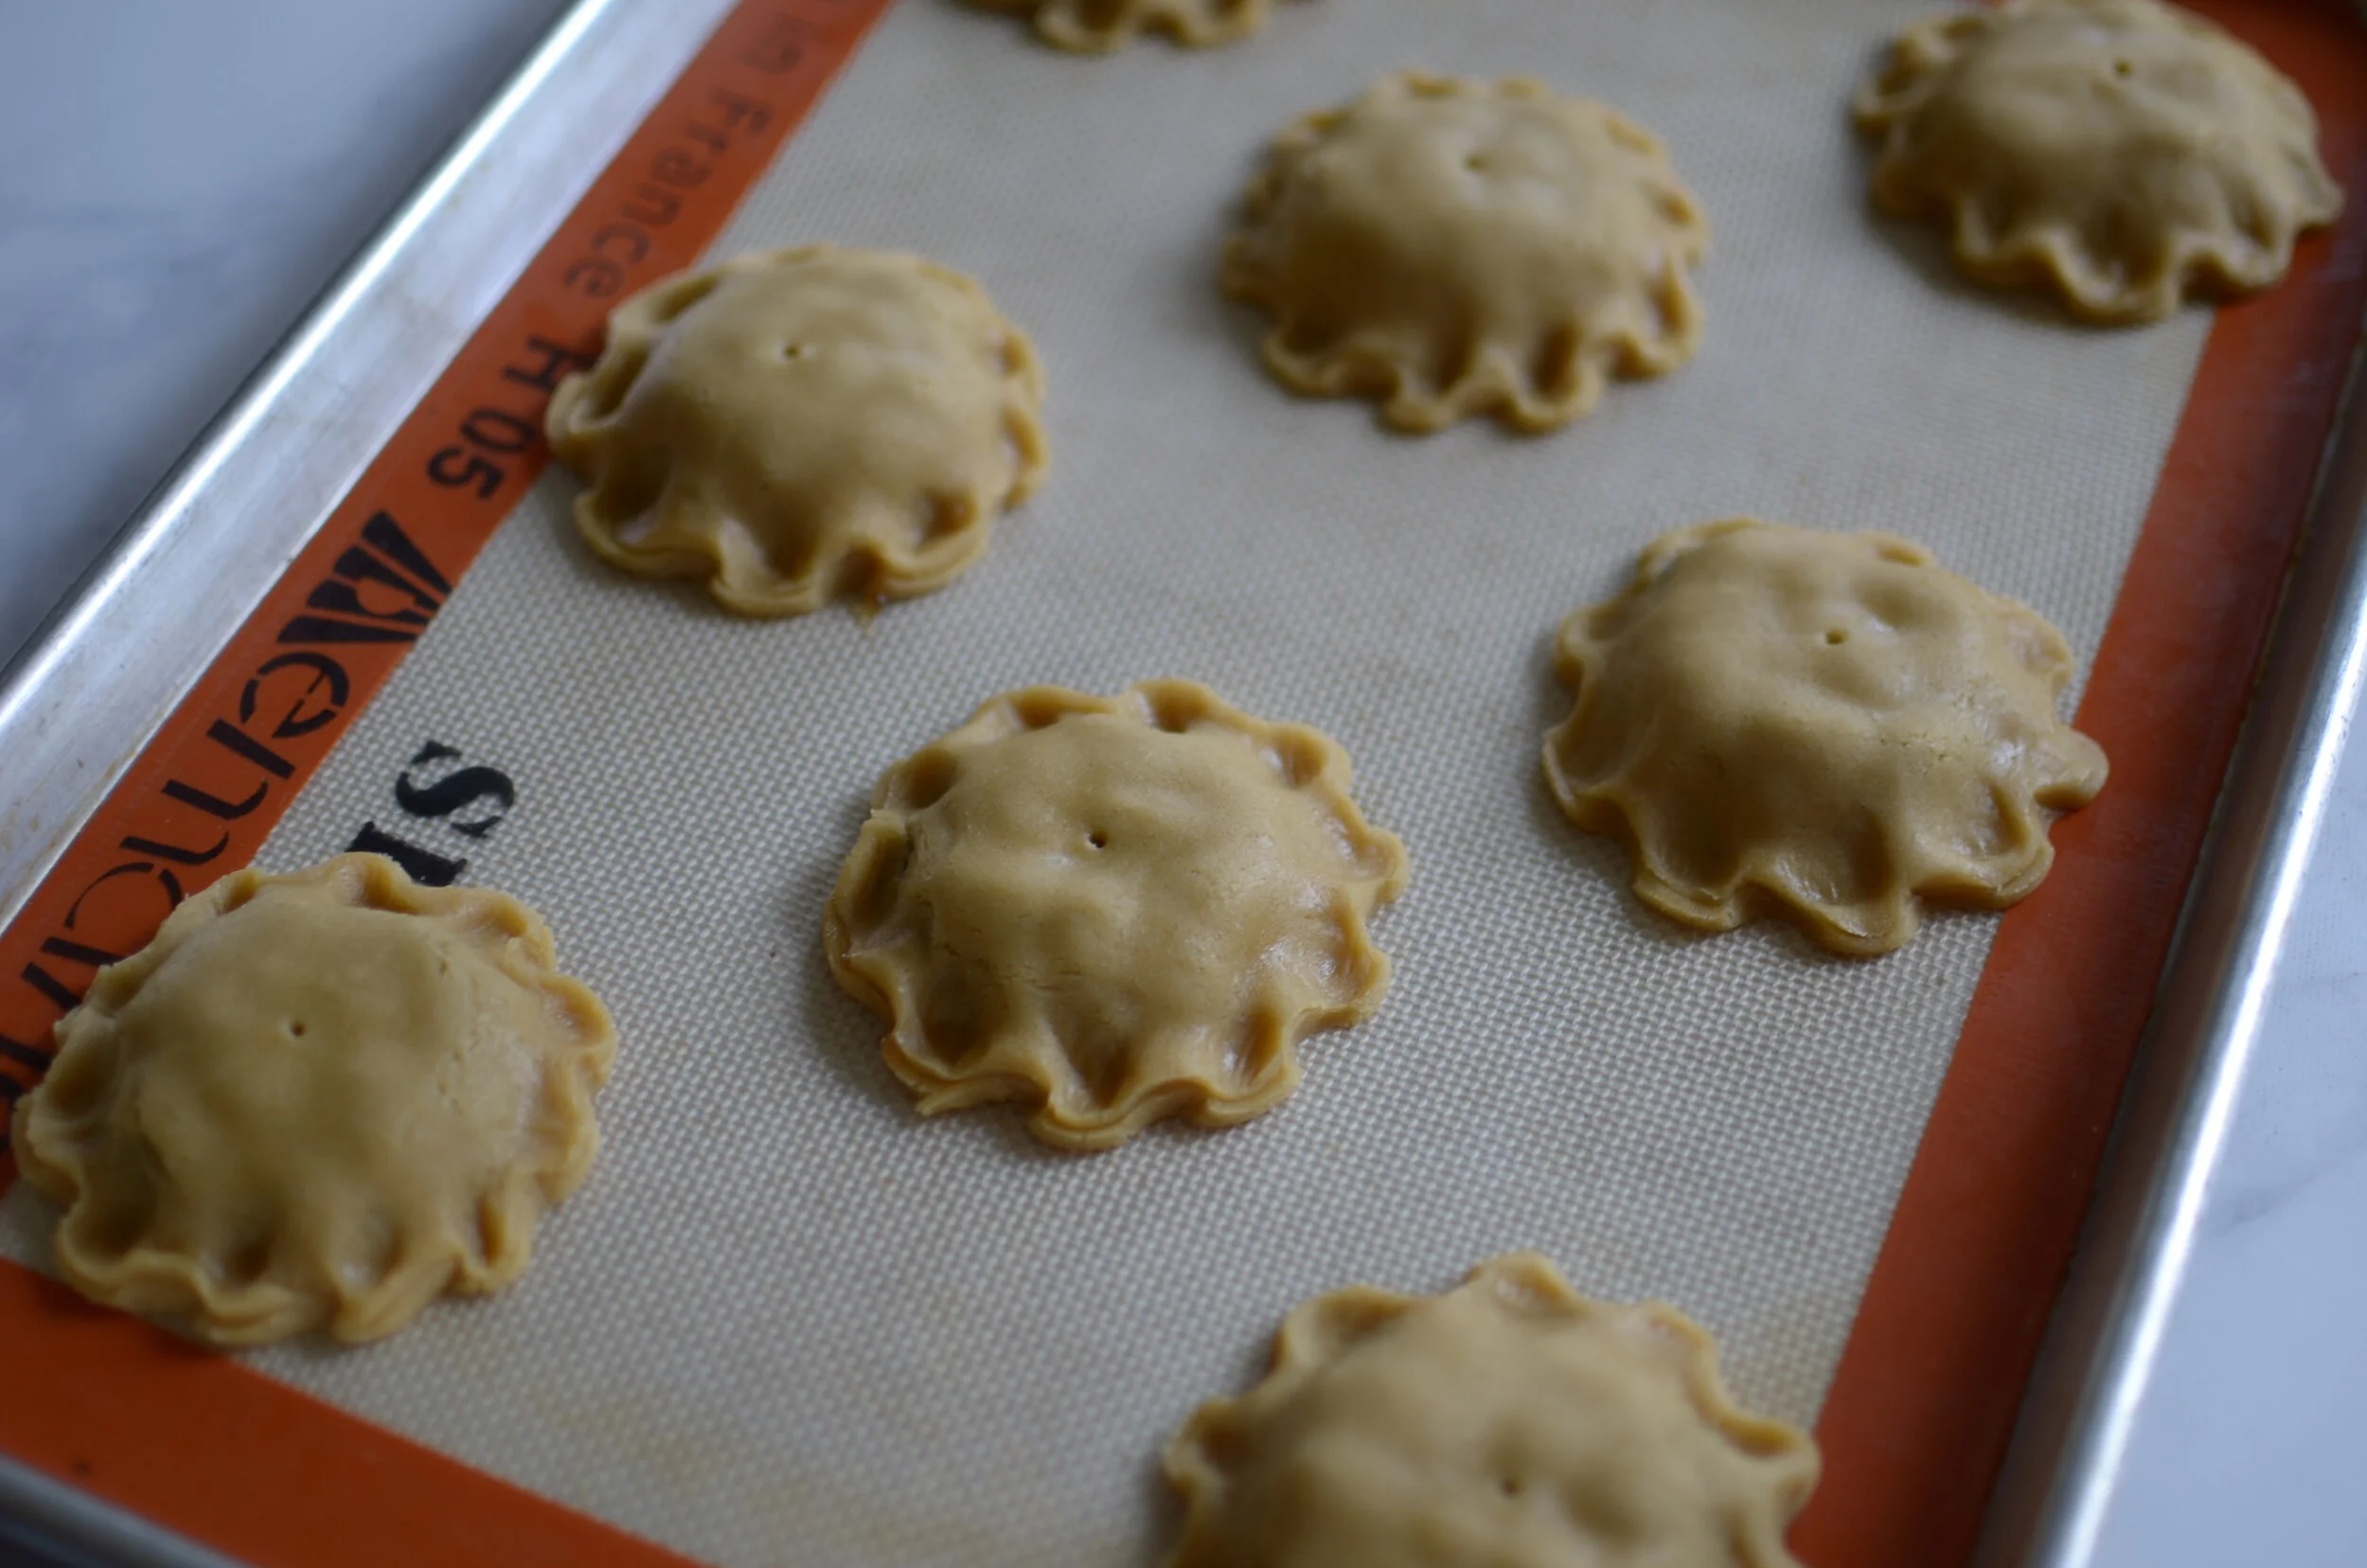
If you want to be fancy, you can do a little crimp action with your fingers. Or you can go “old school” and crimp the edges with a fork. I’m feeling fancy today. Use a toothpick to make a little vent hole in the center of each cookie and chill for at least 15 minutes before baking.

making.raisin.filled.cookies.5.jpg

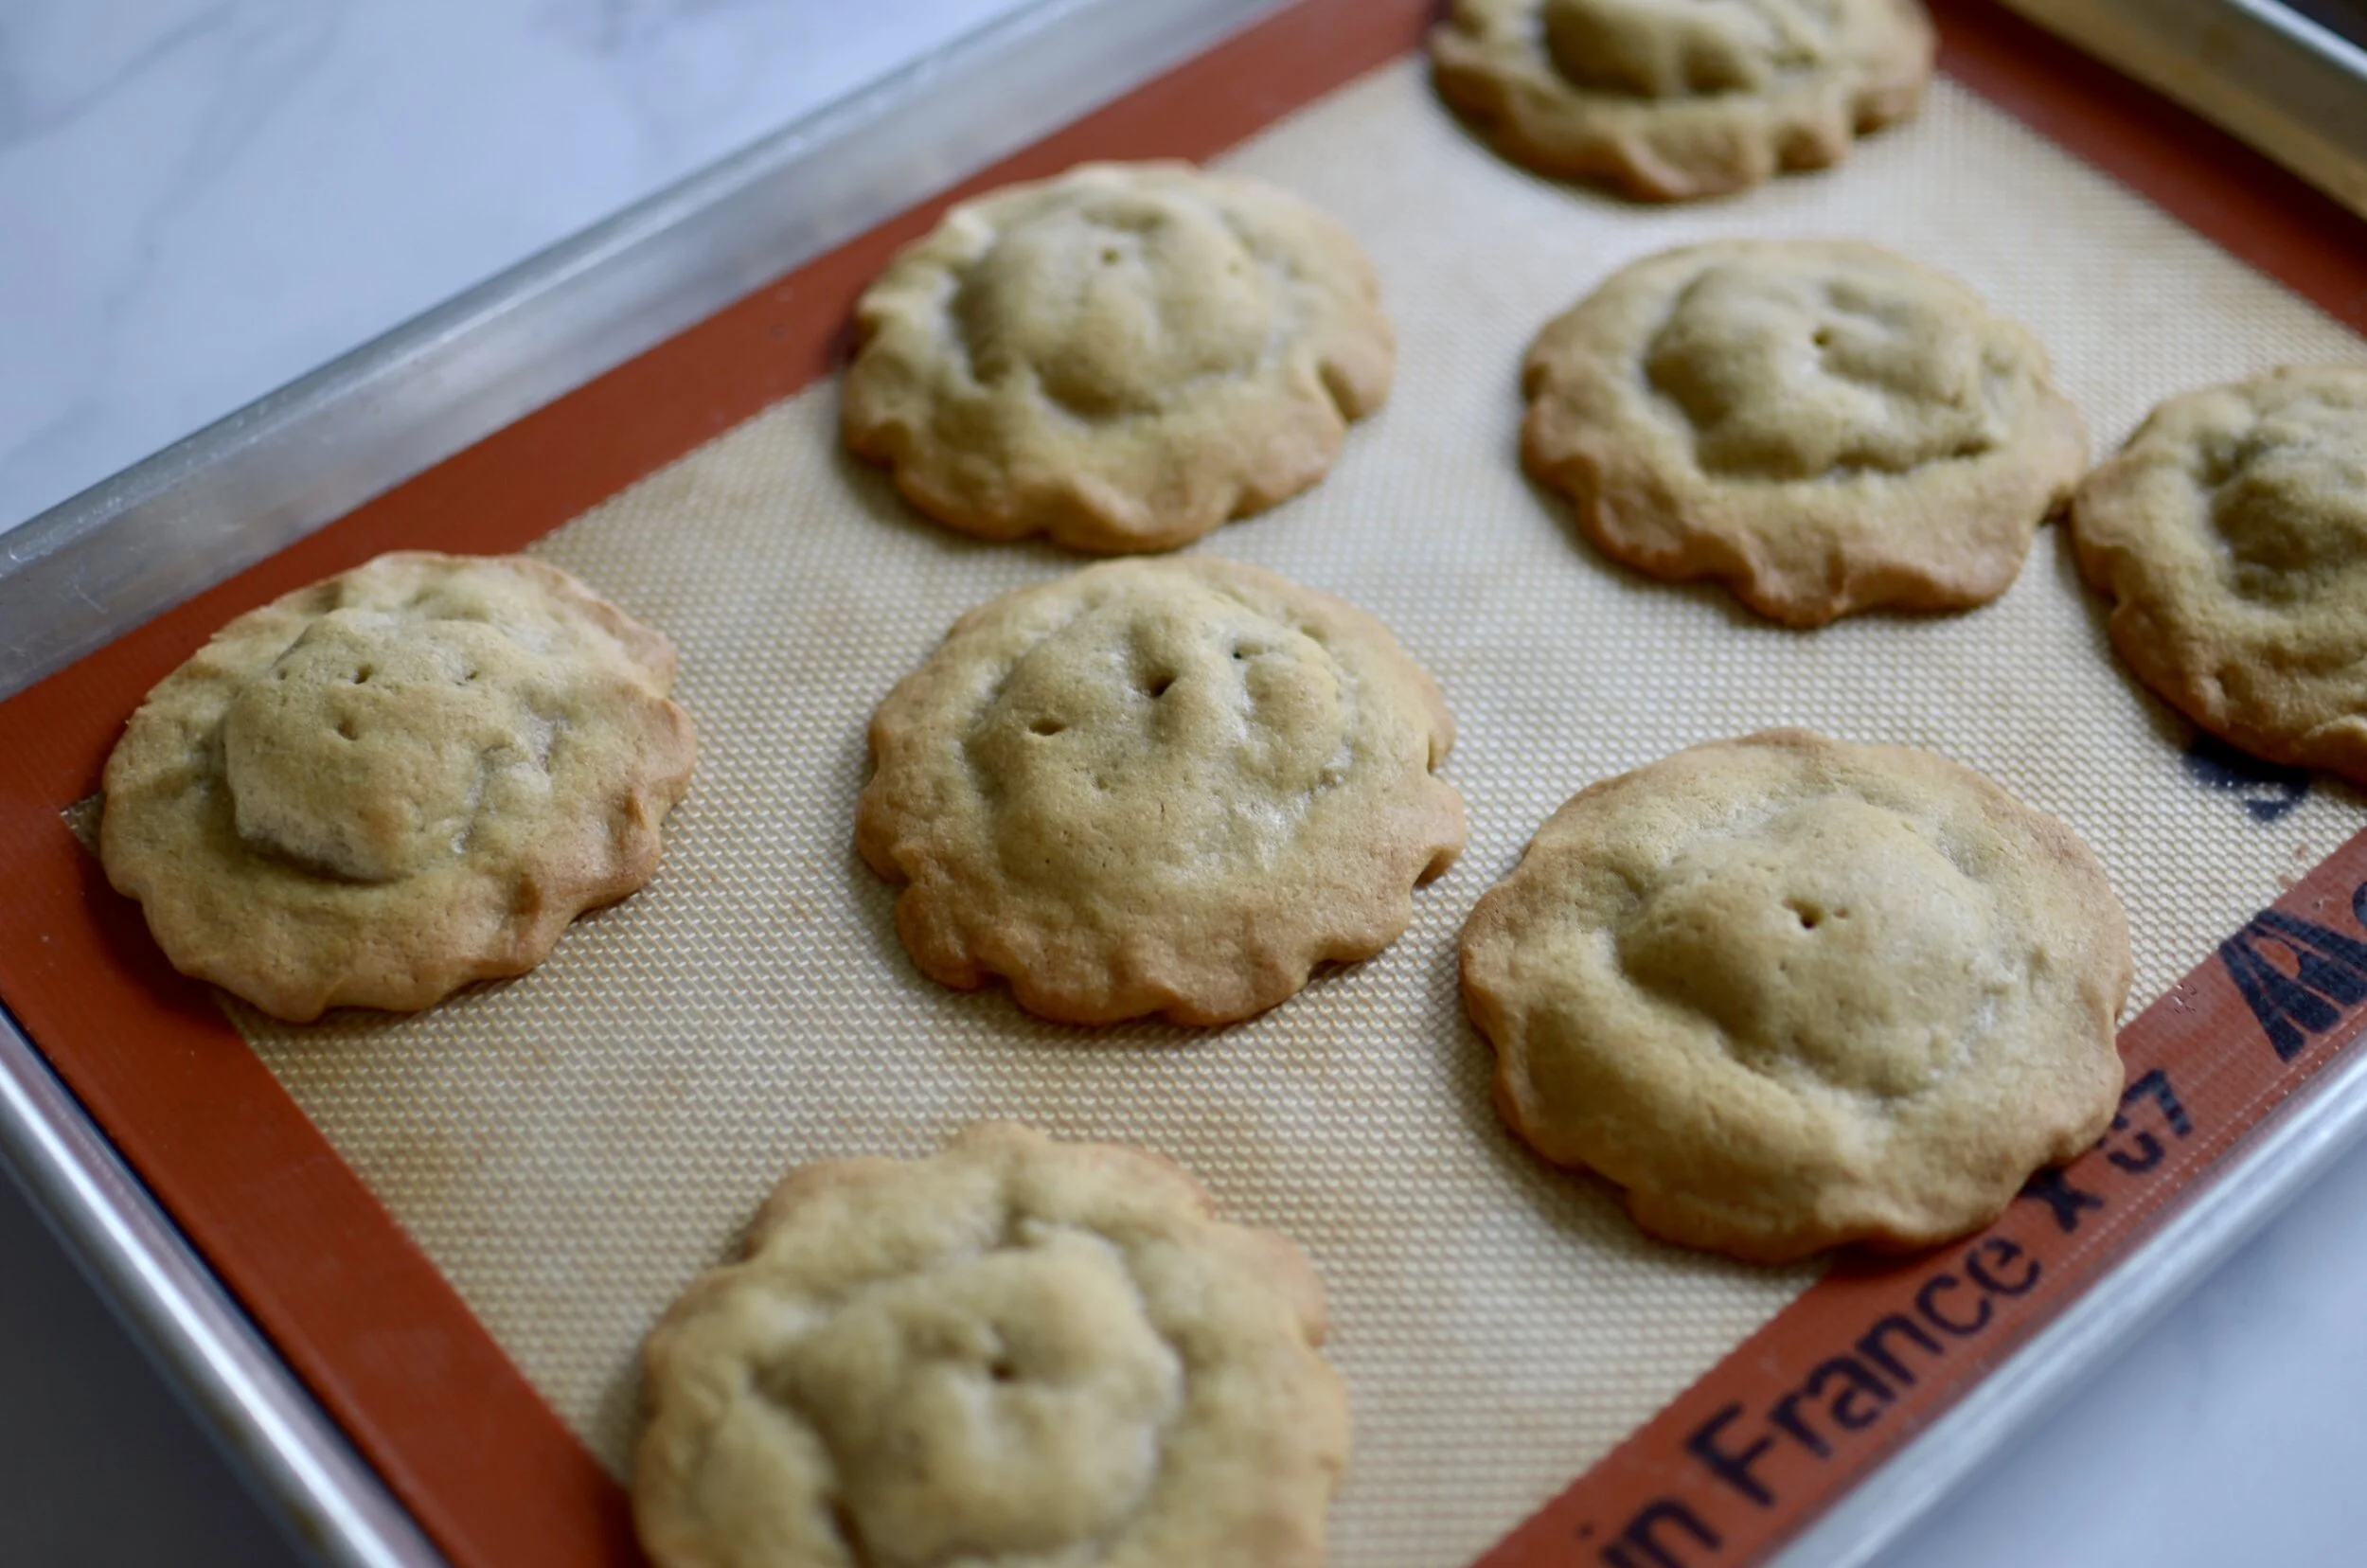
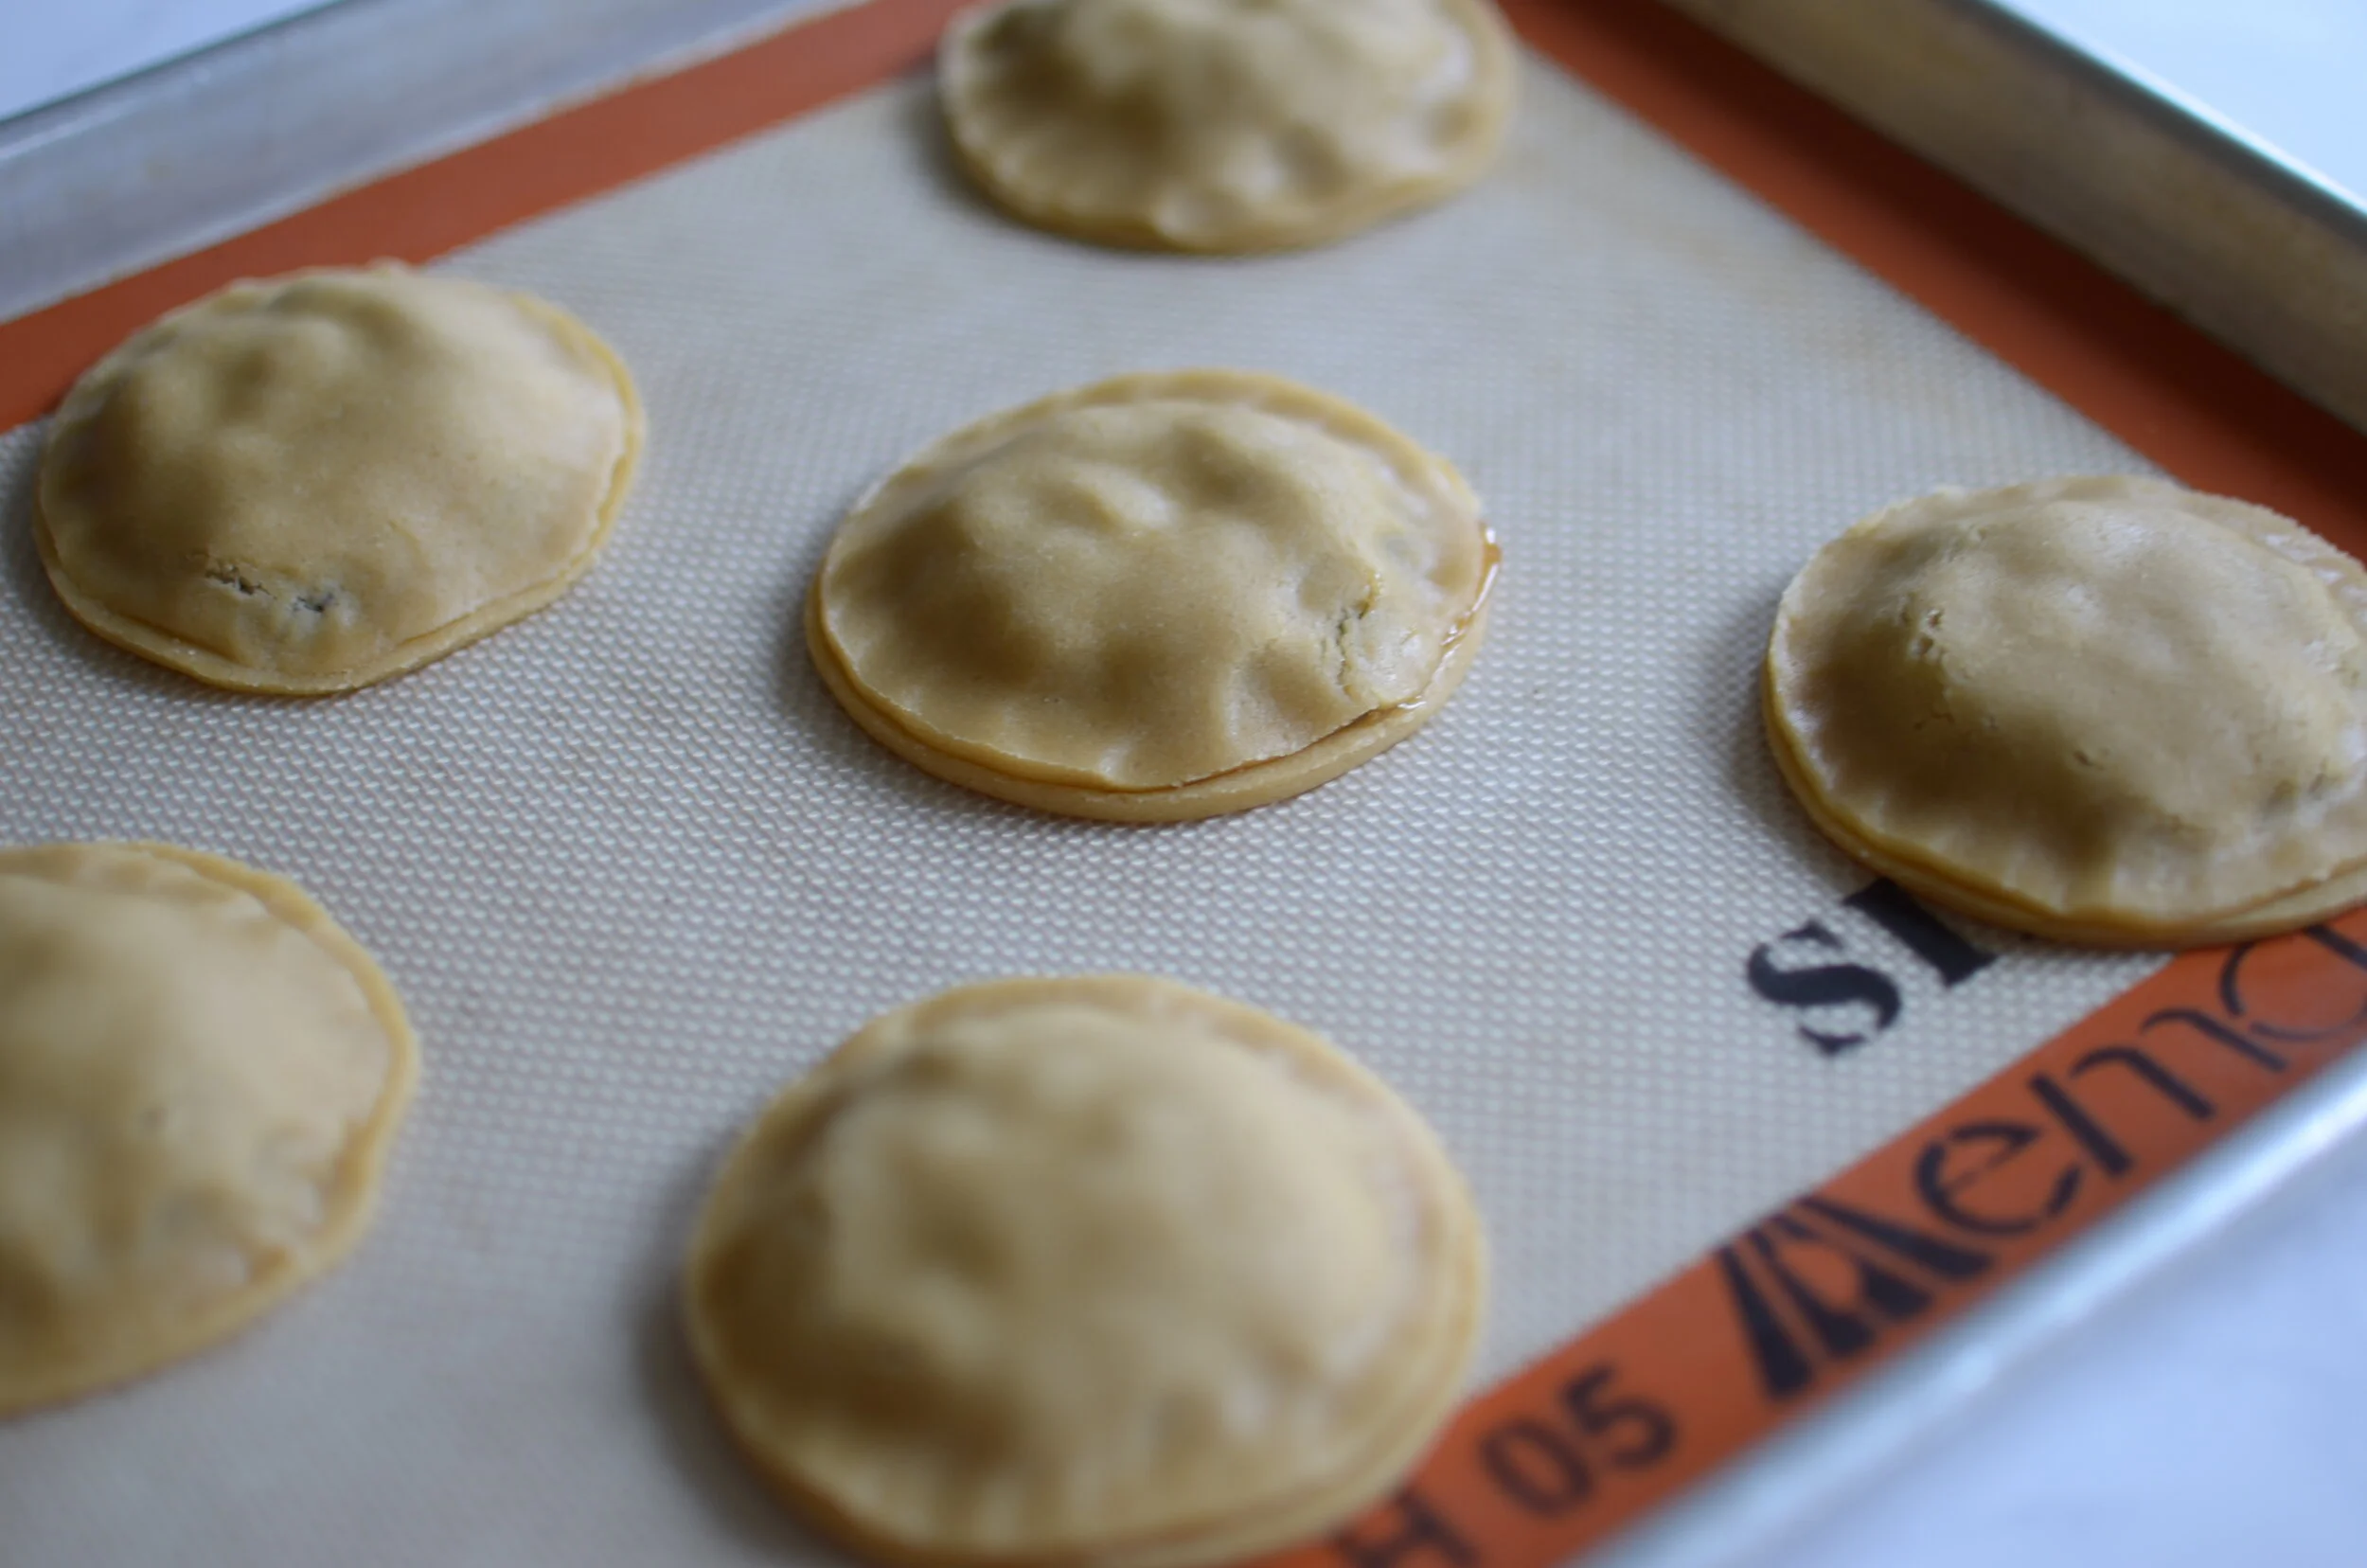
The cookies puff and spread quite a bit in the oven so don’t put more than 8 on a half sheet pan (5 or 6 if you use a smaller cookie sheet).

old.fashioned.raisin.cookies.3_butteryum

Cool completely and enjoy! Store at room temperature in an airtight container for up to a week.

Items used to make this recipe:

(affiliate links)


Old Fashioned Raisin Filled Cookies

makes 35 very large cookies

Printable Recipe

Ingredients

Dough:

  • 1/2 pound unsalted butter, room temperature

  • 2 cups lightly packed brown sugar

  • 3 large eggs

  • 4 cups all purpose flour

  • 1 teaspoon baking soda

Filling:

  • 1 pound raisins

  • 1 cup water

  • 3/4 cup granulated sugar

  • 2 tablespoons cornstarch

  • 1/2 teaspoon pure vanilla extract

Recipe Directions

To Make the Dough (the night before baking):

  1. In the bowl of a stand mixer fitted with the paddle attachment, cream butter and brown sugar together until light and creamy (about a minute).

  2. Add the eggs, one at a time, until each is fully incorporated; scrape down the sides of the bowl as needed.

  3. Add the flour and baking soda until no traces of dry ingredients remain.

  4. Transfer dough to a gallon-size zip-top plastic bag and chill overnight before using.

To Make the Filling:

  1. In a medium saucepan over medium-high heat, combine raisins, water, sugar, and cornstarch, stirring occasionally, until the mixture reaches a full boil.

  2. Remove from heat and stir in pure vanilla extract.

  3. Transfer filling to an airtight container and allow to sit at room temperature until needed (can be made a day ahead).

To Assemble and Bake the Cookies:

  1. Preheat oven to 350F, place rack in center position, and line 2 or 3 half sheet pans with silpat liners.

  2. Allow cookie dough to rest at room temperature for 15-20 minutes before rolling (or knead until pliable).

  3. Roll dough to 1/8-inch thickness between two layers of parchment or wax paper.

  4. Use 3-inch round cutter to cut 8 bottoms per sheet tray.

  5. Top each bottom with a #50 scoop of filling (a little over 1 tablespoon). Be sure to drain away excess liquid if your filling is very “juicy”.

  6. Cut another 8 dough rounds to top the filling for each cookie.

  7. Gently press to flatten cookies before crimping the two disks of dough together with your fingers or a fork; use a toothpick to make a small vent hole in the center of each cookie.

  8. Chill for 10-15 minutes before baking.

  9. Bake one sheet pan at a time for 10 minutes; remove from oven and allow cookies to cool completely before serving. Store leftovers in an airtight container.

Notes

  • For best results, bake only one sheet pan at a time and be sure cookies have chilled properly before baking.

  • No need for extra flour when rolling dough between two layers of parchment or wax paper.

  • Filling should not be too goopy or “juicy” when filling the cookies. Drain away excess liquid before using to prevent the bottom of the cookies from getting soggy.