Prime Rib Roast
Patricia @ ButterYum
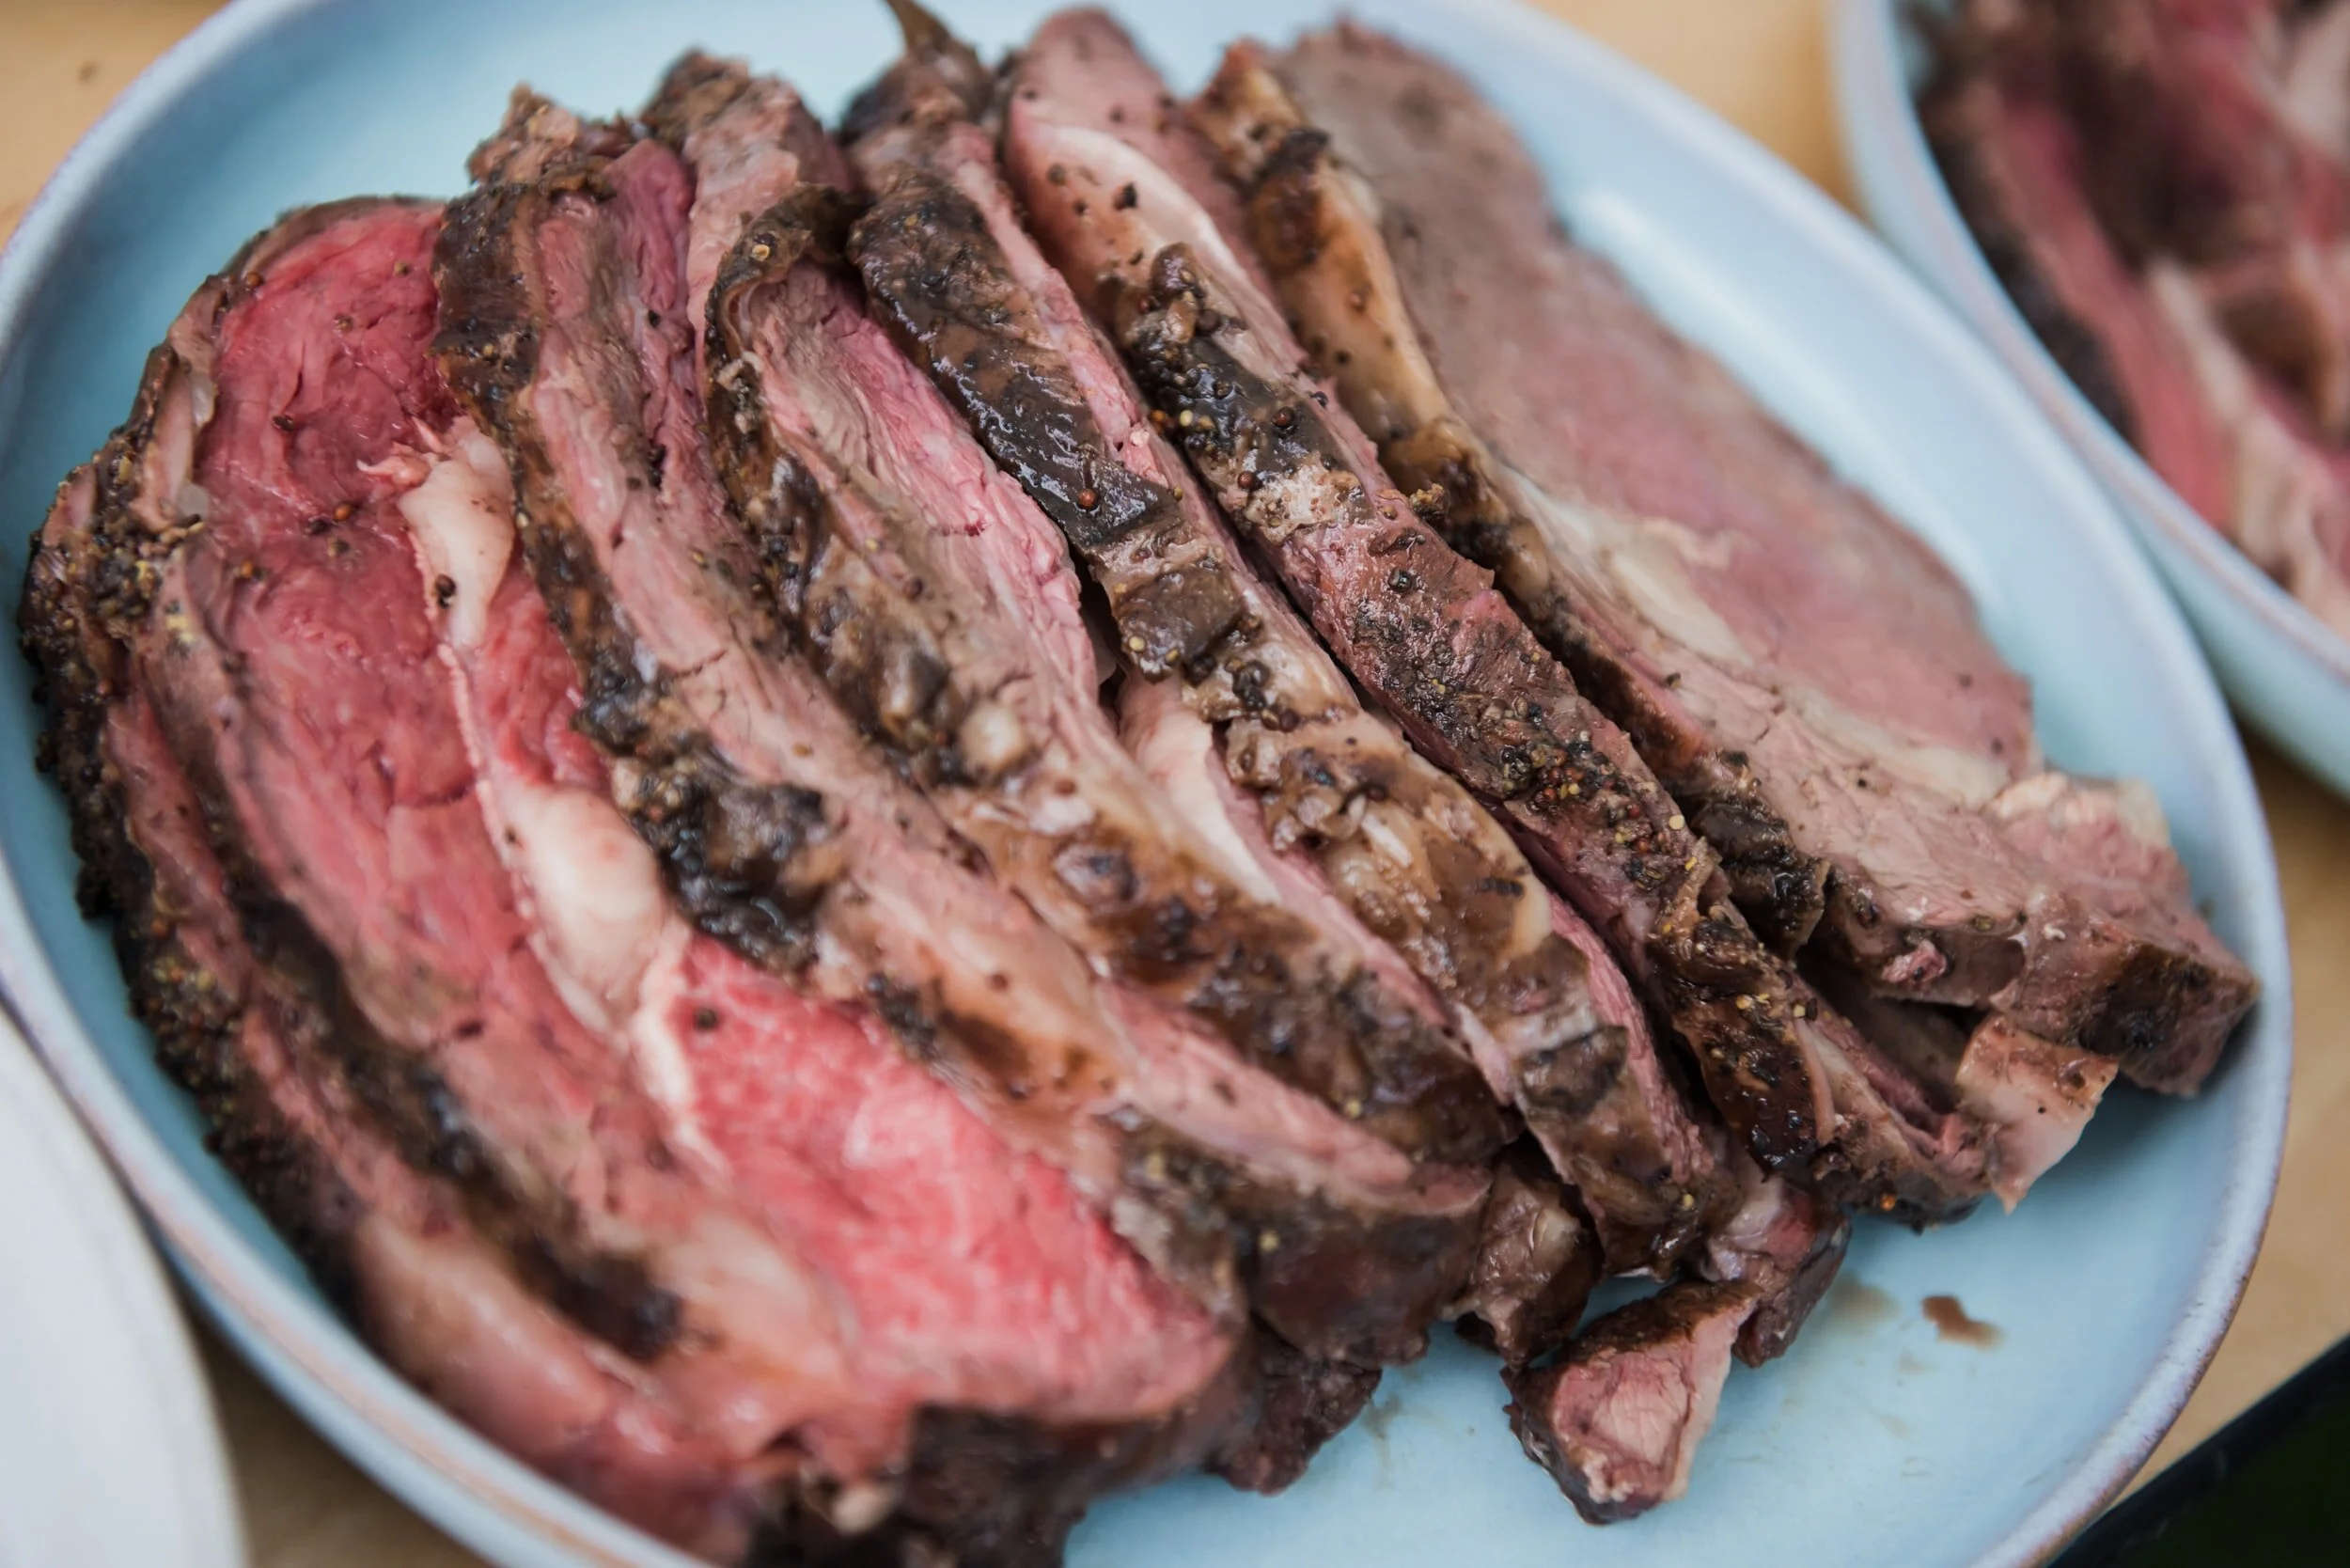
Nothing beats a perfectly cooked Prime Rib Roast (aka Rib Roast, Standing Rib Roast, or Christmas Roast). There are a number of cooking methods that produce amazing results, but many of them are not precise enough to be able to predict the exact time your roast will be ready to serve. That might be fine if you’re just cooking for your family, but when dinner guests are involved, it really helps to have a technique that can be calculated down to the minute. So that’s the technique I’ll be sharing with you today.
The first thing you’ll need to consider is what size bone-in Rib Roast to purchase. A Standing Rib Roast will contain 2-7 ribs. As a general rule, plan on one pound per person or 2 servings per rib. You can ask the butcher to “French” the ribs if you like (that’s when they scrape the ends of the ribs clean), but it’s not necessary (and you can save a little money if you don’t).
The next thing you have to consider is whether or not to get dry aged beef. Dry aged is going to cost a bit more, but some people prefer it. But either way, it’s going to be amazing so don’t worry about it too much.
The last thing you should consider is whether you want your rib roast cut from the “chuck end” or the “loin end”). I should mention, if you choose a 7-rib roast, you’ll get both ends automatically, but if you oder a smaller roast, you can choose which end of the roast you want. The chuck end (ribs 6-9) is located near the chuck and the meat contains more pockets of fat. The loin end (ribs 10-12) is located near the loin and the meat is more lean. Either way, the sous vide technique is going to provide super tender and flavorful results so it really boils down to personal preference.
Oh, and this is very important - be sure to order your standing rib roast so it’s ready for pickup a day or two before you cook it (24 hours is good, but 48 hours is even better).
Once you get your prime rib roast, you’ll need to calculate your timeline. This timeline will include dry brining for a day or two, allowing the prime rib to come to room temperature before roasting, the total time the prime rib will actually roast in the oven, and the time the roasted prime rib should rest before serving.
Here are the guidelines you should follow for each step in the process.
Dry brine for 24-48 hours before roasting (24 hours is great, but 48 hours is better). Use 1 teaspoon Diamond Crysal kosher salt per pound or 2/3 teaspoon Morton kosher salt per pound (see the recipe below for directions).
Allow the prime rib to sit at room temperature before roasting (1 hour per rib or 1 hour for every 2 pounds). DO NOT RINSE THE SALT OFF.
Calculate total roasting time by multiplying exact weight of your roast by 14 minutes per pound.
Allow the cooked roast to rest for 30-120 minutes before serving (30 minutes for small roast or up to 120 minutes for a larger roast).
EXAMPLE: So let’s say I’m cooking a 5-rib roast that weighs exactly 10 pounds - Here’s what I’d do:
1-2 DAYS AHEAD: Dry brine roast with the proper amount of kosher salt (see recipe below) for at least 24, but up to 48 hours.
CALCULATE COOKING TIME: 10 pounds multiplied by 14 minutes per pound = a total cooking time of 140 minutes.
ROOM TEMP: Allow a 5-rib roast to sit at room temperature for 5 hours before roasting.
ROAST: Cook roast for 30 minutes in a preheated 450F oven, then lower the oven temp to 325F for the remaining time (in this case the remaining time is 110 minutes).
REST: Remove roast from oven, tent with foil, and rest for about 90 minutes (for 5-rib roast) before carving.
Enjoy!!
Items used to make this recipe:
(affiliate links)
roasting pan with V-rack https://amzn.to/2KgQhXt
Diamond Crystal kosher salt https://amzn.to/41El2bw
Morton kosher salt https://amzn.to/3UZQhZX
Prime Rib Roast
(plan on 1 pound per person or two servings per rib)
Ingredients
10 pound Prime Rib Roast (or 1 pound per person or two servings per rib)
Kosher salt (1 teaspoon per pound if using Diamond Crystal or 2/3 teaspoon per pound if using Morton)
1/4 cup freshly minced garlic (about a whole head of garlic)
2 tablespoons unsalted butter, room temperature
2 tablespoons olive oil
1 tablespoon ground black pepper
1 tablespoon freshly chopped rosemary or dried thyme (I prefer rosemary)
Directions
Prep (1-2 days ahead):
Dry the roast well with paper towels and sprinkle it liberally on all sides with kosher salt (1 teaspoon Diamond Crystal kosher salt per pound or 2/3 teaspoon Morton kosher salt per pound).
Place salted roast on roasting rack suspended over a roasting pan and refrigerate, uncovered, for 24-48 hours.
On the big day:
Calculate your total roasting time by multiplying the weight of the roast by 14 minutes per pound.
Remove prime rib from refrigerator and allow it to sit at room temperature for 2-6 hours, depending on the size of the roast - DO NOT RINSE THE SALT OFF (1 hour per rib or 1 hour for every 2 pounds).
Preheat oven to 450F and position the oven rack in the lower third of the oven.
Make a paste with the minced garlic, room temperature butter, olive oil, pepper, and freshly chopped rosemary (or dried thyme); spread paste all over the entire roast.
Place prepared roast back onto the roasting rack with the fat cap on top; pour 1 cup water into the roasting pan.
Roast, uncovered, for 30 minutes, then reduce the oven temp to 325F and continue roasting for the remaining amount of time from your calculations.
Remove roast from oven and tent with foil; allow to rest 30-120 minutes before carving (30 minutes for a smaller roast, longer for a larger roast).
Note
The garlic/rosemary paste amounts listed in the recipe above are suitable for a 10-pound roast. Scale them up or down depending on the size of your roast.
